Tuesday, 30 April 2013

Which distros would you save?

Introduction

One of the comments that is quite often made on Reddit and in other Linux forums is that there are a lot of distributions that are just re-spins of Ubuntu, Fedora, openSUSE etc.

Diversity is great and it is good that people put the effort in to creating a distribution.

Some people say though that it would be better if some of the smaller distro creators concentrated on contributing to their upstream project.

You can argue for both camps in this debate. If there isn't a distro doing what you do and it is worthwhile then there is merit to your work. On the flip side if more people worked on the upstream projects they may be even better than they already are.

So the point of this post is to run a little poll and it is just for fun.

Imagine that tomorrow the world decided there can only be a limited number of distributions. Which distributions would you save?

The Poll

Please place a checkbox in all the distributions you would save. Sorry if your distribution isn't listed already. I had to stop somewhere.

Monday, 29 April 2013

The best screenshots of Everyday Linux User all in one place

Introduction

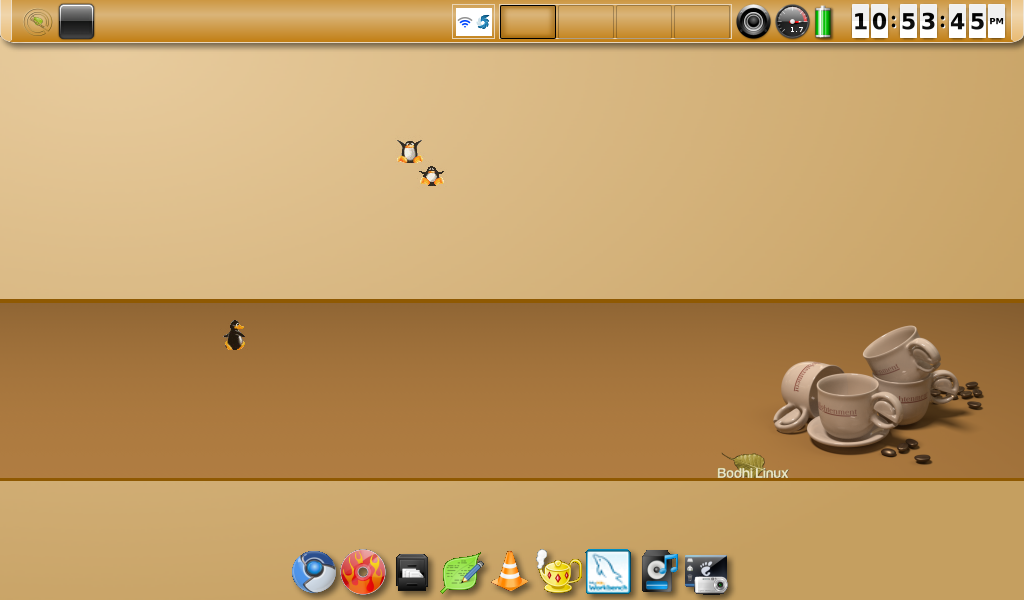
One of my favourite things about blogging about Linux is the artwork that I find whilst trying out different distributions.

Sometimes the images in the blog posts are commented about after the article by readers of the blog.

I therefore decided to create a Pinterest page which shares my favourite images. 

I would like to clarify that the desktop images that I use aren't always taken from the distributions themselves. The wallpapers come from various sources on the internet and sometimes they are photos taken with my own digital camera.

I hope you enjoy viewing them. I have included some of my favourite images within this post.

Pinterest Page

To see the Everyday Linux User Pinterest page visit:
 http://pinterest.com/everydaylinux/everyday-linux-user/

Subscribe

If you like the articles that appear on this blog why not subscribe?

Read the articles before anyone else and be the first to comment.

Enter your email address:


Delivered by FeedBurner


Thursday, 25 April 2013

Is there an easier transition to Linux from Windows than PCLinuxOS?

Introduction

In the past couple of weeks I have taken a look at two of the more popular Linux operating systems.

Last week I tackled Debian and before that I tackled openSUSE.

This week I am looking at one of the more user friendly operating systems and one a Windows user looking to move to Linux for the first time.might want to try.

PCLinuxOS is aimed at a similar audience to Ubuntu, Linux Mint and Zorin but unlike those operating systems PCLinuxOS is not based on Debian.

So without further ado lets get started.

Installation

You can download PCLinuxOS from this link:
 http://www.pclinuxos.com/?page_id=10.

I chose the KDE 32 bit desktop version. The machine I chose to install PCLinuxOS on is the Samsung R20. (The same machine that I had previously installed openSUSE and Debian).

I installed the live KDE version to a USB drive using UNetbootin and rebooted the computer.


The PCLinuxOS installer (Drak) is one of the best I've used. From start to finish the install took about 10 minutes.


The first part of the installer deals with partitioning your drive. You can choose to use the entire disk, use existing partitions or choose a custom partition setup..


Depending on which partitioning option you chose a few extra screens appear asking about the partition setup and then the installer creates the partitions and then starts copying the files.


When the files have finished copying you are then asked to choose the boot loader.

That is it. You are then asked to reboot the machine and you are ready to go.

Well actually not quite. When you reboot you are then asked the rest of the necessary questions such as keyboard layout, timezone and user details.

A nice touch though is that when I first boot into PCLinuxOS it has remembered my wireless connection from when I entered it into the live session saving me from having to enter the password again.


When you first log in you are shown a message stating that your system needs to be updated.

I followed the instructions and 128mb of updates were installed which is not unreasonable.

First Impressions


When you first log in to PCLinuxOS you are presented with a screen that to Windows users may seem quite familiar.

There is a taskbar at the bottom and just a couple of icons on the desktop.


The taskbar contains a menu icon, a series of quick launch icons and in the bottom right a system tray with system icons and a clock.

From left to right you have the icons which brings up the menu, show the desktop, configure your desktop, configure your computer, a file manager and virtual desktops. (You may notice in the screen above that there is a FireFox icon as well but that is because FireFox happened to be running at the time the image was taken).

In the system tray the icons are for network settings, klipper (a clipboard tool), sound, (then there is a little arrow which when expanded gives options for)  desktop notifier, kwallet, korganiser and notifications. Finally of course there is the clock.

The two desktop icons are to show the home folder and the trash icon to show the recycled files.

If you click the PC button (which for a Windows user is where the Windows start button is) then a menu appears.

I find this menu to be a bit underwhelming and chaotic. There are simply too many categories and no search feature.

KDE has a better menu system than this and you can turn it on by right clicking the PC icon. Now select the switch to "Application Launcher Style".


The application launcher style menu is much nicer for navigating and it has the search feature.

Simply type a keyword or a program name and the chosen item is likely to appear.

The layout of this menu is much nicer as well. 

You have the favourites tab which should contain the applications you use most and is fully customisable.

There is the applications tab which provides a list of categories and then applications within the category.

The computer tab provides access to important folders.

The recently used tab shows your most recently accessed applications, files and folders and last but not least the leave button gives you options for closing down the computer.

Customising the desktop

If you are a Windows user looking to move to Linux then you should consider that PCLinuxOS as a real step up.

Not only does it perform better than Windows it is fully customisable as well. Sure at first the desktop looks exactly the same but I am sure that is just to make everyone feel at home. We have grown up all our lives with Windows so showing people a Windows style desktop isn't a bad way to go.

Customising the desktop is made easy in PCLinuxOS. To be honest everything is made easy in PCLinuxOS.

Lets start with changing the most basic thing, the desktop background. 

Right click anywhere on the desktop and click the item that says "Folder View Settings". Now that name may not sound as nice as "Change desktop background" but there is a reason for the menu item name that I will come to later.


PCLinuxOS comes with a nice selection of default stock wallpapers but you can add your own by clicking "open" and then navigating to the path to an image file you saved onto the computer. When you have chosen the image you wish to use click "Apply".


As you can see you can brighten PCLinuxOS up with a few simple clicks.

Other things you can change in the folder view settings are the mouse actions and also if you choose the location option you can choose the icons that appear on the desktop.

Now for your main desktop you might wish to leave it as is or you may wish to add a few widgets.

You can add widgets by right clicking on the desktop. Now select "Add Widgets". There are a whole host of widgets available. 

One of the best widgets is the shelf. (Doesn't sound very exciting does it). Adding a shelf enables you to group all your folder icons into one place. It makes it possible to group your icons and move them around your desktop en block.


Now my example above isn't the greatest but I have chosen to add the places icons into the shelf. You can put anything in there. You can add pictures, movies, music etc.

Other widgets include calendars, the weather forecast, RSS feeds, CPU monitors etc. 

Now everything you have seen thus far you can actually do in Windows (even Vista had these options). Windows however doesn't have the option of multiple desktops. The last icon in the quick launch bar gives you the option to switch desktops.

Each desktop can have a different desktop background and different widgets on it.As well as that each desktop can have a different activity. Remember earlier when I mentioned "Folder View Settings". Well if you click in the top right hand corner then a new menu appears and one of the menu options is "Activities".

Each activity can give you a different way of viewing things. For example as well as the folder view there is the search view or the grouping view or the newspaper view. 

There are a whole host of other options for configuring your desktop.

Simply click the configure your desktop icon in the quick launch bar (spanner and screwdriver)..

You can add desktop effects, configure desktop search, change screen resolution, change the locale and window appearances.

The systems settings screen that loads lets you configure other things as well such as network settings, bluetooth, printer configurations, the login screen and many other settings.

If you want to configure more serious options such  as adding users to your system, setting up a firewall, creating an FTP server etc then you can click the "configure your computer" icon on the quick launch bar which is a little spanner icon in a circle. To run this feature you need to be able to enter the root (administrator) password you created when you first installed PCLinuxOS.

Connecting to the internet
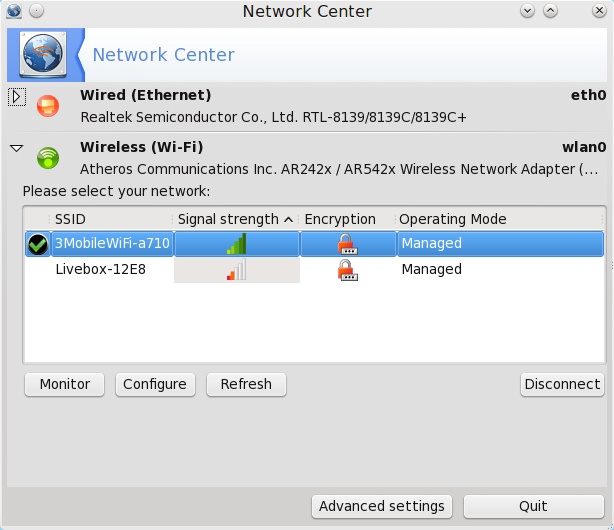
If you setup the internet whilst running the live session of PCLinuxOS then the connection will be remembered when you install the system which means you are automatically connected.

Obviously you may move around and so the wireless connection will be different from place to place. To change the wireless connection click the network icon in the system tray.

The network card on my PC was picked up straight away in the live session and carried across to the installed version.


Clicking the network icon brings up a screen similar to the one displayed and as you can see I have two networks available to me.

If I click the other network than the one I am connected to it asks for my security key and after entering the key KWallet appears asking whether I want to use it to keep my passwords safe.

Flash and MP3
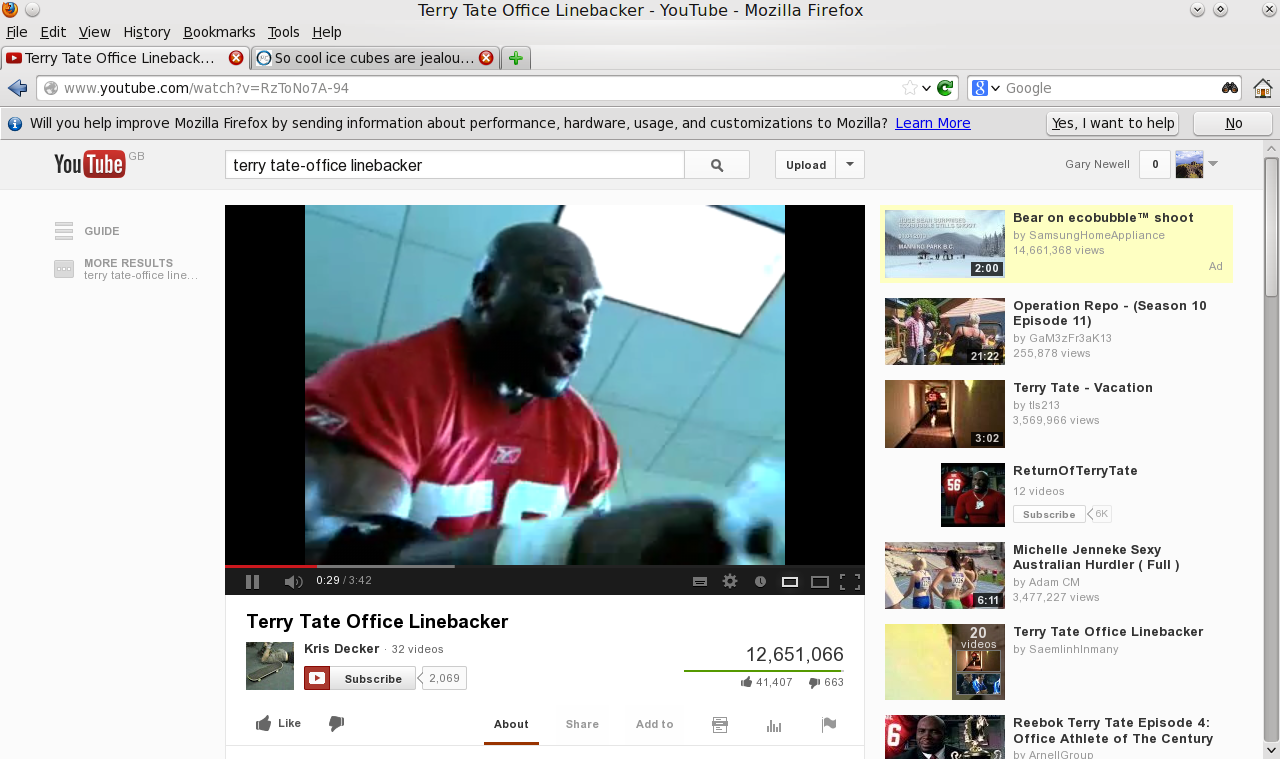
PCLinuxOS is impressive on most fronts and I wasn't at all surprised to find out that Flash and MP3s were able to play straight away.

What is also impressive is that the default music player is Clementine which is a top music application.


Applications

Bearing in mind that I used the live disk to install PCLinuxOS there is an impressive amount of applications installed by default. 

The following table provides a list of some of the applications installed.

Video
Imagination - DVD Slideshow Maker
VLC Media Player - Media Player
Kamerka - Webcam application
TV Time - Television Viewer
K9 Copy - DVD backup
Dragon Player - Video Player
Sound
KSCD - CD Player
Clementine - Audio Player
Juk - Music Player
Office
LibreOffice Writer
LibreOffice Calc
LibreOffice Database
LibreOffice Impress
Okular - Document Viewer
Calibre - Ebook library Management
KOrganiser - Personal Organiser
KCalc - Scientific Calculator


Internet
KTorrent - Bittorrent Client
Krfb - Desktop Sharing
KGet - Download Manager
Dropbox - Online File Hosting
Thunderbird - Email Client
Filezilla - FTP Client
Kopete - Instant Messenger
KFlickr - Photo Management
KGmail - Gmail Notifier
Choqok - Microblogging Client
KRDC - Remote Desktop Client
Skype - Video Calling
UMTSMon - Control 3G Devices
FireFox - Web Browser


Graphics
DNG Image Converter
GIMP - Image Editing
ImageMagick - Image Editing
KColour - Paint
Digikam - Photo Management
Inkscape - Vector Graphics

Games
KBreakout - Arkanoid
Bovo - 5 in a row
Gnugo - Chess style game
Kigo - Go
KMahjongg - Mahjongg
Kiriki - Yahtzee
LSKat - Card Game
KPatience - Patience
PySolFC - Card Game
KSudoku - Sudoku
KMines - Minesweeper
Naval Battle - Ship Sinking Game
KAtomic - Logic Game
KHangMan - Hangman

File Tools
Dolphin - File Manager
Konqueror - File Manager
Midnight Commander - File Manager
(Various Other Tools not listed)


Editing
KWrite - Text Editor
More Applications
Ark - Archiving tool
K3B - Disk burning
Nepomuk - Backup
Q7Z - 7Zip
KWallet
Samba
UNetbootin
(and loads more tools)

Installing Applications

The application used to install applications is Synaptic.

If you happen to have used Debian or Ubuntu based distributions you will have come across this application many times.

Synaptic provides a good interface for searching for the applications that you want to install..


For example my favourite browser is Chromium but by default only FireFox is installed. 

(Oddly enough searching for Chromium comes up blank (even with other repositories selected). However searching for Chrome comes back with the option for installing Google Chrome.)

The PCLinuxOS Magazine

Every month there is a magazine released for PCLinuxOS. I have enjoyed reading this magazine for a while even though this is the first time I have used PCLinuxOS.

I would recommend reading the edition for January 2013 if you are installing PCLinuxOS for the first time as it provides a really good tutorial on how to install PCLinuxOS from scratch.

Summary

PCLinuxOS is a really good distribution especially for newcomers to Linux. If you are really fed up with Windows and have been scared off by the talk of having to enter commands into a terminal window then PCLinuxOS maybe your answer.

PCLinuxOS is one of the few distributions where the terminal application isn't immediately available and to be honest for most users it is unlikely you will ever need it.

This really is a distribution for everyday computer users who surf the web, create documents, do a bit of microblogging or online interaction via Facebook etc. It is a great alternative to Windows and a throughly professional looking operating system.

Any complaints? Not really. I'm not a fan of the classic menu that is installed by default but that was easily swapped out and I did have a KDE crash message appear although it never had any effect on the running system.

I would probably recommend that if you are going to try this out and you want the full experience that you should skip the live distribution and go straight for the full monty option.

One word to sum up PCLinuxOS. Impressive.

Click here to download PCLinuxOS


Wednesday, 24 April 2013

Installing and booting 2 or more Linux based operating systems on a USB pen drive

Introduction

This week I discovered a tool that I hadn't come across before and I thought I'd share it with people who also may not know that this tool exists.

There are a number of different tools out there that enable you to put a Linux based operating system on a USB pen drive. The one that I prefer to use is called UNetbootin.

UNetbootin is a really good tool. There are versions for Windows, Linux and the MAC. Simply choose your distro, pick your USB drive and hit go.

The one thing UNetbootin doesn't do is enable you to install more than one operating systems to a USB drive and then boot from each one individually.

YUMI

The tool I found for burning multiple Linux distributions to a USB drive is called YUMI and it can be downloaded from http://www.pendrivelinux.com/yumi-multiboot-usb-creator/.

The site www.pendrivelinux.com has links to a number of other very good tools so even if you don't like the YUMI approach it is worth a visit.

Unfortunately YUMI only works with Windows so to follow this tutorial you will need to go to the dark side for a short period.

Creating a dual boot USB drive with multiple Linux distributions


When you run YUMI for the first time you are asked to agree to the license agreement. 


After accepting the license agreement you are straight into the action.

Step 1 - Choose your USB Drive

First of all you need to select your USB drive. It is definitely worth making sure you have the correct drive chosen as the drive will be formatted.

Step 2 - Choose your first operating system

Now go down the list of distributions until you find the one you want to use. There is a huge list of distributions available.

Step 3 - Browse to the ISO

You can choose to let the tool download the ISO or you can download the ISO image yourself from the relevant Linux distribution's website.

If you download the image yourself then you will need to click the browse button and navigate to the downloaded image.

Step 4 - Click Create


A message appears telling you what is going to happen.

This is the last point to check the drive that you will be writing the image to is correct. If you are unsure, check and check again.

If you are absolutely sure you don't need anything on the USB drive and that you have indeed selected the correct USB drive click "Yes".

Step 5 - Wait for the files to be installed


The files will be now be installed to the USB drive and when it is complete you will be asked if you want to install another operating system.

 
If you choose "yes" then you basically repeat steps 1 to 4 again.

In theory you can install as many operating systems as you desire but it depends on the amount of disk space of the USB drive.

The end result

 
If you reboot your computer and leave the USB drive plugged in then the computer will into a rather garish looking menu.

It isn't the prettiest menu you will ever see but it is functional.

There are three levels of menu. The first lets you choose whether to boot from the hard drive or the USB drive.


If you choose the USB drive you then get to choose the second menu which lists all the distros that you have installed.

When you choose the distro of your choice you will then see a third menu with the possible options for that distribution


Tuesday, 16 April 2013

End of the road for Fuduntu?

I have just followed a link on Reddit that states that the Fuduntu project is closing down in its current form.

The main reason cited for Fuduntu closing is that it is becoming increasingly unsustainable to provide a Gnome 2 based distribution as many applications are built to work with Gnome 3.

Last year I wrote a review of Fuduntu and in that review I was very positive about Fuduntu as a project because it worked well and had some unique tools and the Gnome 2 base made it very quick.

The other point to note about Fuduntu was the amazing artwork used on some of the wallpapers. They provide by far the best wallpapers out of all the distributions that I have used.

In my review I stated the following:
I do not know how long the Fuduntu team intends to continue using the Gnome 2 desktop and whether they will adopt one of the other desktops as they mature or whether they will do the same as Zorin and create their own desktop. 
I guess the time to make that decision has arrived and the decision that was chosen was to close down the project in its current form.

Now for the good news.

It doesn't appear to be the end of Fuduntu. A new project will hopefully rise from the ashes and it is likely to be based on another desktop although details at the moment are quite sketchy.

I would urge anyone who likes the Fuduntu project to read this article as it gives details of an online IRC meeting that is going to take place to discuss the future.

On Reddit there is some discussion that the new desktop will be KDE. I'm not so keen on this idea. Fuduntu needs to reposition itself again and there are already a lot of KDE based distros. Someone on Reddit suggested Razor-QT. I think this would be a novel idea and might just work.

Incidentally all this brings into question other distributions that have used a Gnome 2 base such as SolusOS. SolusOS has forked the code and has called it Consort. Long may this continue as I really like SolusOS as well.

I would like to wish the Fuduntu team all the best for the future.

Thankyou for reading.

Debian.... The daddy of all distros?

Introduction

A couple of weeks ago I wrote a review of OpenSUSE. As one of the bigger distributions I asked the question whether OpenSUSE is a real alternative to Ubuntu.

I received a lot of comments about the review, some positive and some negative. The main issues included the fact that I had installed OpenSUSE from a live disk and the fact that I appeared to be biased towards Ubuntu.

I would like to clarify that I am not deliberately biased towards Ubuntu or Ubuntu based distros. I have used a lot of Ubuntu based distributions and therefore subconciously I may find it easier to use these systems. Similarly I have used Gnome, XFCE and LXDE more than I have used KDE so I will instantly feel more comfortable with these desktops.

I think using a live disk as a basis for an installation is not a bad one. It gives you a base working system on which you can build upon. The alternative is to get multiple DVDs full of applications. It is highly likely that most of the applications will never be installed and the ones that are will probably have been updated since the DVD ISOs were created.

Maybe Ubuntu wasn't the distribution to compare OpenSUSE with. Maybe Debian was a better source for comparison.

Therefore this week I have decided to review Debian. To keep the comparison against OpenSUSE fair I have used a live disk again and I have also decided to go for the KDE version. Whilst reviewing Debian I installed it fully to the hard drive of the Samsung R20 computer used for the OpenSUSE review.

The Debian Site

Before I talk about the main installation I would like to talk about the process of obtaining a Debian Live Image.

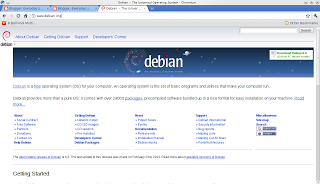
The path to get ISO images for Debian is insane. I am going to try and demonstrate this with images.


So the image above is the home page for Debian. So far so good. There is a clear heading that says "Getting Debian" and underneath a link to "CD ISO Images".


The link takes you to a page where you can decide how to obtain your CDs. You can buy them, get them using Jigdo, use BitTorrent, download using http/ftp or Download live images using HTTP/FTP or bittorrent.

I chose the last option which is to download live images but say for instance you chose the download CD/DVD images option above that link.

You now have the option of downloading the official stable versions of from the testing branch and further down the page you get a list of mirrors.


Look at the number of files available. On that page there appears to be the KDE live image.

Imagine now that you had used a mirror instead of the official stable image.

You now get a list of folders and if you choose the current_live version you get a page with another list of folders.


You can now choose whether to use the AMD64 or i386 and if you choose for instance i386 you get a list of folder names which will be meaningless to a lot of people.

The average person would not have a clue what any of these folder names mean. Finally if you select iso-hybrid you finally get to a download page with the following listing:


The list of files is absolutely huge. Incidentally if you just click on the live disks link then you get to the page you want straight away with a similarly long list of files.

It would be very easy to get lost in the maze of links on the Debian site. 

Installation

Anyway all of that was fairly irrelevant. As long as you can read and pay attention to what you are selecting then you should be able to find the file you want.

If you want to try out the version of Debian used in this article then you can download it by clicking this link.
and then download the KDE live ISO.

I used Unetbootin to copy the Debian distribution to a USB drive, plugged it into the Samsung R20 and booted it up.

A menu appeared with a list of options and I chose to boot into the live image. I always do this to make sure I won't have any problems when it comes to accessing the internet and to make sure there are no glaring issues.

On this occasion I noticed that I couldn't connect to the internet. I referred to the Debian documentation and I came across this nugget of information which explained the situation fully.

What you have to do is download a firmware zip file and unzip it to a folder called firmware under the root directory of the USB drive.

I did just that and restarted the machine and I was now able to connect to my home broadband service and my mobile broadband provider.

I played around a bit more with the distribution before going for the full installation but no other serious issues occurred so I decided to go for it.

The Debian installer works really well and is fairly easy to use. Choose your language, keyboard, timezone, enter the hostname, choose a root password and create a standard user.

The partitioning section gives you the option of choosing a guided installation or to go for a custom one. I chose the guided installation and I chose to use the entire disk. At this point I am given the option to create one big partition or to create a home and root partition or go for the third option which creates separate home, tmp, var and usr partitions. I went for the home and root partition to separate the operating system from my user files. By default Debian sets aside space for a swap partition.

After creating the partitions and formatting them the files are copied and installed to the system and the grub partitioning section starts.

At this point I came across issues.
grub-pc failed to install into /target/
I was given the opportunity at this point to try again or continue. Trying again did nothing. Pressing continue gave me the option to use LILO instead. Attempting to install LILO gave a similar error.

I tried various methods to get past this error but in the end I gave up and rebooted the USB drive and this time instead of booting into the live image I chose the text install option.

The text install option gives you all the same options as the graphical installer used within the live image. This time however I had no issues at the GRUB install stage and at last Debian was installed.

First Impressions


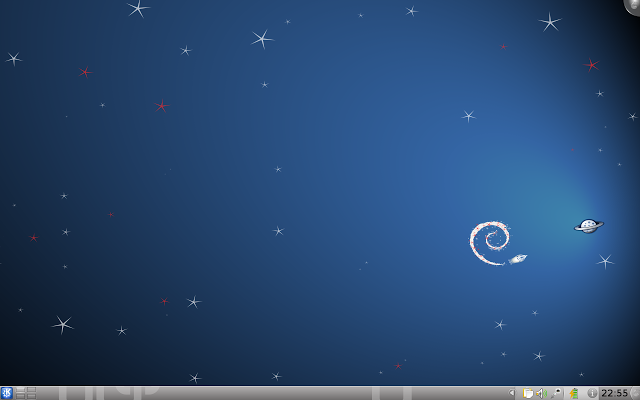
The Debian KDE live image provides a fairly blank canvas. In the bottom left corner is the K symbol which brings up the KDE menu and in the bottom right corner a series of icons such as an audio icon, list of recently accessed files, network connections, plugged in devices, notifications, battery monitor and of course the clock.

The bottom bar (or panel) can be completely customised and this will be discussed later. You can also add further panels.

Connecting to the internet


To connect to the internet I clicked the network icon on the bottom panel and chose the option for managing connections. The above screen appeared showing a list of networks.

I chose to connect to the mobile broadband whereupon I was able to enter the security key required for the 3 mobile broadband network.

After entering the security details the application KWallet starts which enables you to keep all your passwords in one place. This means that you can connect to the network again next time by entering a password as opposed to the wireless security key.

Applications

I have to say that I was incredibly impressed with the depth and quality of applications installed by default with Debian.

Debian -> Accessibility 

  • XMAG - Magnifies an area of the screen

Debian -> Data Management

  • OpenOffice ORG Base - Database

Debian -> Editors

  • Nano
  • XEdit

Debian -> File Management

  • K3b - disk burning

Debian -> Graphics

  • ImageMagick - Image editing
  • OpenOffice Draw - Image editing
  • GIMP - Image editing
  • XWindow - Screenshot

Debian -> Network -> Communication

  • MUTT - command line email client
  • Telnet - Telnet client
  • XBIFF - Shows new mail

Debian -> Network -> Web Browsing

  • Iceweasel - Web browser
  • W3M -  text based browser

Debian -> Office

  • OpenOffice Writer - Word processing
  • OpenOffice Calc - Spreadsheets
  • OpenOffice Impress - Presentation

Debian -> Programming

  • Beanshell (text) - Scripting language
  • Beanshell (window) - Scripting language
  • Python - Scripting language
  • Ruby - Scripting language
  • TCLSh - Tool Command Language

Debian -> Science -> Mathematics

  • Bc
  • Dc
  • OpenOfficeOrg Math
  • XCalc

Debian -> Shells

  • BASH
  • DASH
  • SH
There are also a host of system tools that are available as well as games and the default KDE applications such as Konqueror, Gwenview and KSnapshot.

The one tool that didn't appear to be available was Synaptic.

Installing Applications

To install applications in Debian the tool for the job is APT. I like APT. I feel at home with APT. I find it intuitive and easy to use.

There were two programs I wanted to install. One was Synaptic (a graphical tool for installing applications) and the other was Chromium (the web browser).

To start off with I opened a terminal window and had a look in the /etc/apt/sources.list file. I knew I would need to edit this file because I needed to add the online repositories as opposed to using the local repositories.

I therefore typed sudo nano /etc/apt/sources.list and received an error stating that I did not have permissions to use sudo.


I switched the user to the root user and edited the /etc/sudoers file using nano. I added the line:
 gary ALL=(ALL) ALL
I saved the file and exited out of the root shell and I was then able to edit the sources.list file.

Within the sources.list file I added the path to the Debian main, contrib and non-free repositories. I added the non-free option because I knew I would need this to install Flash later on.

With all that done I then ran the sudo apt-get update command and then I was able to install Synaptic by running sudo apt-get install synaptic and I was able to install Chromium by running sudo apt-get install chromium-browser.

From now on I will be able to use Synaptic to install software and I did because I needed a good music player for the next section and so I chose to install Amarok.

Flash and MP3

I ran the Chromium browser and went to Youtube and attempted to watch videos and was surprised to see that I could straight away.

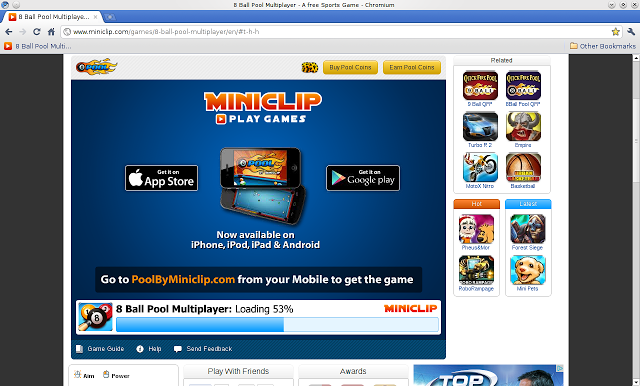
I suspected this might be more down to Youtube and Chromium than Debian's ability to play Flash out of the box. I therefore went to Miniclips to play Flash games and I was right. I was unable to play any games as shown below:


Fortunately installing Flash in Debian is relatively easy after adding the non-free repository to the sources file.

All I had to do was run Synaptic and search for Flash-Nonfree.


To test the ability to play MP3 files I ran Amarok and to my surprise it worked straight away.


Customising the desktop

First things first. The wallpaper is a bit bland. To fix this right click on the desktop and click on folderview settings. (or if you are using a desktop activity you would click desktop settings.

    There are a number of wallpapers installed by default and you can change the wallpaper simply by selecting the one you want to use.


    Of course you can also download and use your own wallpaper.


    Changing wallpapers isn't the only thing you can customise. You can add extra panels and you can add widgets to any other part of the screen.

    The other thing you can do is add a new activity. An activity basically gives you a new desktop and you can by default choose to have a desktop view or a folder view.

    The folder view enables you to choose a folder which will then add icons to the desktop for each item within the folder.

    The desktop view gives a blank desktop. In either case you can add widgets to the desktop

    Summary

    So what are my thoughts of Debian?

    Lets get the bad bits out of the way first. 

    There is the minor point at the beginning where finding the correct ISO could be a challenge for some people. 

    More serious than this is the installer issue with the GRUB errors. I have seen a whole host of people on forums with a similar issue. I could understand this error more if I had downloaded the testing branch or the unstable branch but I downloaded a live image from the stable branch. I think there would be a good number of people who gave up at this point. 

    The other point I would say is that I found OpenSUSE easier to customise when it came to customising KDE. I like the shelves that came with OpenSUSE and there were more activity options. With a bit of a play I am sure I could get to the same place with Debian.


    Now for the good bits. 

    If it wasn't for the Grub error installation would have been a breeze and the text based installer was a breeze. The Debian installer is one of the best there is. It works in a completely linear fashion.

    The major selling point of Debian though is the sheer volume of applications available in the repositories and getting the applications is made simple by APT (or if you prefer graphical there is Synaptic).

    Would I recommend Debian to a person new to Linux? 

    The answer to this has to be determined based on what the user wants to get out of Linux. 

    If the user just wants a working out of the box operating system that is graphical in nature and just works out of the box then I would say choose one of the distributions based on Debian or Ubuntu.

    If the user wants to get a base system and build it up and learn a bit about Linux on the way without getting tied up in knots then Debian is a great base to start learning from. Debian also provides a stable branch, testing branch and unstable branch so it is up to each user whether they want cutting edge software that is untested or a stable system that is relatively bug free.

    There are so many distributions out there that have a Debian base and therefore that definitely makes Debian the daddy of distros but for ease of use there are better alternatives such as Mint, Zorin and SolusOS.

    I am going to try the Gnome version of Debian out next week.

    Thankyou for reading.