Introduction
The most popular article on this site is the one that shows people how to install Ubuntu alongside Windows 8.
From the comments at the bottom of the article and the emails that I have received I know that the guide has been successfully followed by a good number of people.
The trouble is that many of you will have installed an earlier version of Ubuntu and you may wish to upgrade to the latest version of Ubuntu.
This article shows you how to upgrade Ubuntu to the latest version without breaking Windows 8.
As with the previous article I am going to include all the steps I deem necessary to achieve this aim which includes backing up Windows and Ubuntu first.
Backup your Windows partition
Most of the text in this section is taken from the previous article but rather than make you navigate to that article I have pasted the important parts here. Obviously make sure you have logged into Windows for this bit.
Creating recovery media using Window's 7 tools
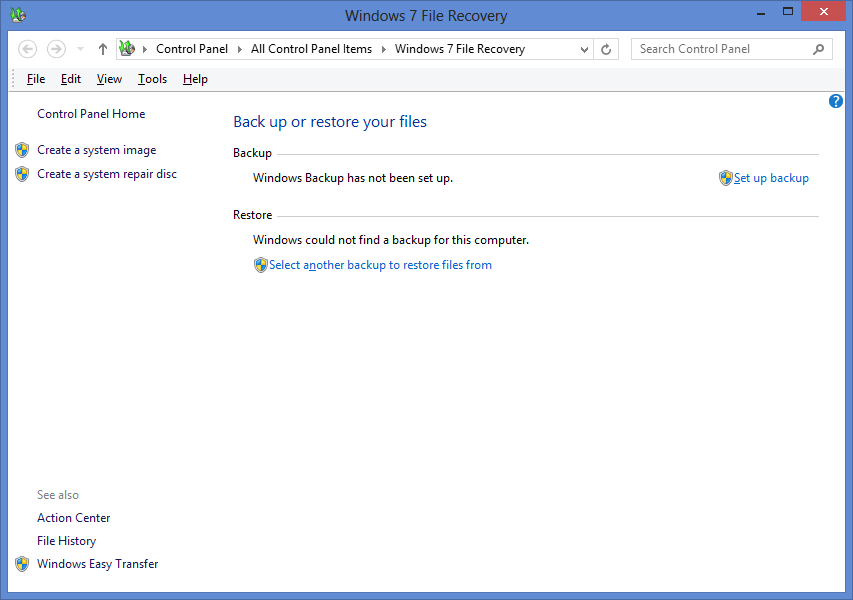
Now the first backup section was a little bit specific to Dell computers. Allowing for the fact that you may not be using a Dell computer this section shows how to create a system image using the Windows 7 File Recovery tools. (I wonder why I couldn't find a Windows 8 one?).
To get to the Windows 7 recovery tools move the mouse to the top right corner and then select the search icon again.
Click on the "settings" option and then type "recovery". The option for "Windows 7 Recovery" will appear. Clicking on this option will display the above window.
There are 2 options here:
- Create a system repair disc
- Create a system image
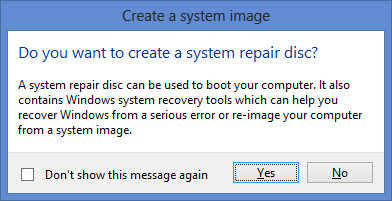
The system repair disc will boot into Windows recovery mode. Choose this option first and insert a blank DVD and then create the repair disc.
The system image takes a copy of all the selected partitions and therefore you can restore your computer to the state it is in at the moment the backup is taken which means all your documents, pictures and videos etc will be safely backed up as well. (You can schedule a system image backup at regular intervals so that you get regular backups).
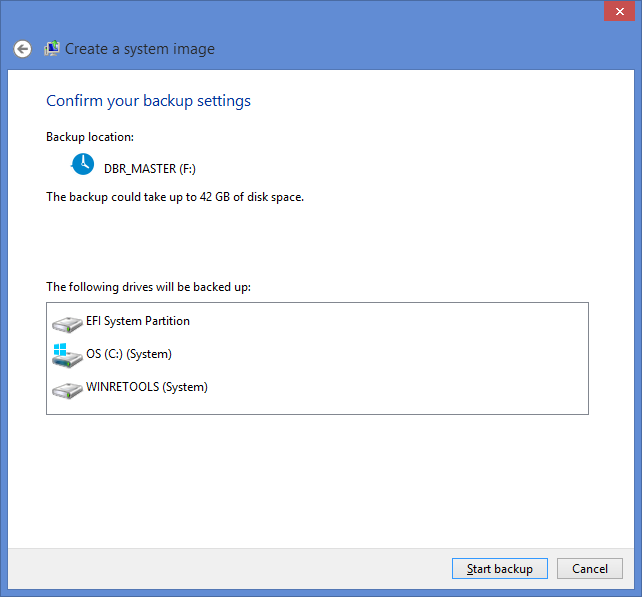
When you create the image you will be shown the backup location where the image will be saved and the partitions that will be backed up.
Now I highly recommend using external storage for this purpose.
An external hard drive is great for this sort of thing but be careful. I have had external drives that corrupted the image due to the nature of pulling out the USB cable before it was ready.
(Yes I am aware that was a dumb thing to do)
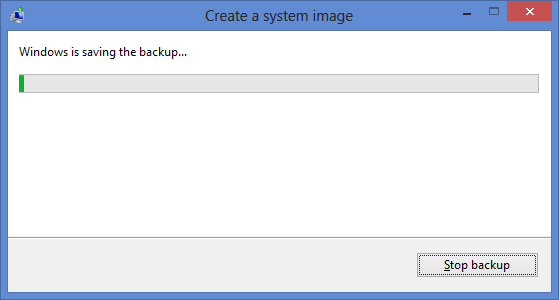
After clicking "Start Backup" the usual random green progress bar starts.
We are all aware at this point that you have to wait an indeterminate period of between 5 minutes and 4 years for the green bar to reach the end and even when it does there is no guarantee it is the end of the process.
I don't want to sound like your mum but you really should do this.
Backup your Ubuntu partition
To backup your Ubuntu partition reboot your computer and make sure you are using Ubuntu and not Windows.
The tool used in Ubuntu to backup your files is DeJa Dup.
You can open the backup utility in a couple of ways.
The first screen gives you the choice to either restore files or show your backup settings.
The option you want to choose is "Just show my backup settings".
There are four tabs worth of settings for backing up your files but do not worry we will cover them in no time.
The tabs include "Overview", "Storage", "Folders" and "Schedule".
The "Overview" tab shows you where you are backing up to, the folders that are being backed up, the folders that aren't being backed up (within the chosen backup folders), when you last backed up and when your next backup is scheduled.
From this screen you can choose to restore a previous backup or perform a backup now. You can also turn on automatic backups.
The "Storage" tab lets you choose where you want to backup your files to.
The "Backup location" will list all your drives and Ubuntu One.
The folder is the name of the folder that the backups will be stored under.
Make sure that you don't put a / in front of the Folder name otherwise you will get a permission denied error from DeJa Dup.
The "Folders" tab lets you choose the folders that you want to backup.
The left pane shows the folders that are being backed up and the right pane shows the folders that won't be backed up within the chosen folders to back up.
You can click the + symbol to add folders to either pane and the - symbol to remove folders.
Finally the "Schedule" tab is used to schedule regular backups and coincides with the "Automatic Backup" option on the overview tab.
Choose to backup daily or weekly and on the same tab choose how long backups are kept for.
To backup Ubuntu go to the "Overview" tab and click "Backup Now".
When backing up your files you can choose whether to password protect your backups or not.
Choose "Allow restoring without a password" if you are the only person with access to the computer and indeed the drive containing the backups otherwise choose "Password-protect your backup" and enter a password.
The backup will begin copying the files to the location specified and when the backup is finished you will see a confirmation message stating that it has completed successfully.
To make sure it has copied the files open the folder and look for the files in the backup location.
The tool used in Ubuntu to backup your files is DeJa Dup.
You can open the backup utility in a couple of ways.
- Click on the settings icon on the launcher and select the "Backup" option or ...
- Open the Dash and start searching for "Backup". Click on the "Backup" option.
The first screen gives you the choice to either restore files or show your backup settings.
The option you want to choose is "Just show my backup settings".
There are four tabs worth of settings for backing up your files but do not worry we will cover them in no time.
The tabs include "Overview", "Storage", "Folders" and "Schedule".
The "Overview" tab shows you where you are backing up to, the folders that are being backed up, the folders that aren't being backed up (within the chosen backup folders), when you last backed up and when your next backup is scheduled.
From this screen you can choose to restore a previous backup or perform a backup now. You can also turn on automatic backups.
The "Storage" tab lets you choose where you want to backup your files to.
The "Backup location" will list all your drives and Ubuntu One.
The folder is the name of the folder that the backups will be stored under.
Make sure that you don't put a / in front of the Folder name otherwise you will get a permission denied error from DeJa Dup.
The "Folders" tab lets you choose the folders that you want to backup.
The left pane shows the folders that are being backed up and the right pane shows the folders that won't be backed up within the chosen folders to back up.
You can click the + symbol to add folders to either pane and the - symbol to remove folders.
Finally the "Schedule" tab is used to schedule regular backups and coincides with the "Automatic Backup" option on the overview tab.
Choose to backup daily or weekly and on the same tab choose how long backups are kept for.
To backup Ubuntu go to the "Overview" tab and click "Backup Now".
When backing up your files you can choose whether to password protect your backups or not.
Choose "Allow restoring without a password" if you are the only person with access to the computer and indeed the drive containing the backups otherwise choose "Password-protect your backup" and enter a password.
The backup will begin copying the files to the location specified and when the backup is finished you will see a confirmation message stating that it has completed successfully.
To make sure it has copied the files open the folder and look for the files in the backup location.
Upgrade Ubuntu
To start the upgrade open the Dash and search for "Updater". You will see the application "Software Updater" appear.
In order to upgrade to Ubuntu 13.10 you will need to install all the recommended updates.
All you have to do is press "Install Now" and the system will update to the latest version of 13.04 prior to 13.10.
To upgrade to Ubuntu 13.10 open the Dash and search for "Updater" again. Open "Software Updater" and this time you will see an option to Upgrade to Ubuntu 13.10.
Click "Upgrade..." to begin the upgrade.
The first screen shows the release notes.
It is important to point out that this article shows how to upgrade from 13.04 to 13.10.
Whilst it is possible to upgrade from other versions to 13.10 you should visit the Ubuntu website to find out the correct upgrade path.
The upgrade enters a number of phases with the longest being the download of the new packages.
Depending on your internet connection this process can take a while.
I would like to say that you can run the Upgrade and then go to your bed and wake up with a nicely upgraded system but you will get asked questions along the way so whilst you can monitor the install and make yourself a cup of coffee you will have to do things along the way.
Near the beginning of the upgrade you will see the screen to the left which shows how many packages are being removed, how many new packages are being installed and how many packages are going to be upgraded.
There is also an estimate of the amount of time it will take to complete the download.
Click "Start Upgrade" to go for it.
Sometimes you will receive a message stating that changes made to a configuration file will be lost by replacing the file with an upgraded version. You can choose to either "Keep" or "Replace" the file. Click on the "Difference between the files" to see exactly what you will lose by replacing the file.
There are certain packages that are rendered obsolete in version 13.10. You are given a list of the packages and you can choose to "Keep" or "Remove" the packages.
When the upgrade has finished you should restart your computer. You will notice that now your Grub menu has Ubuntu listed twice.
The top "Ubuntu" is 13.10. Boot into the top "Ubuntu" to try Ubuntu 13.10 for the first time.
If everything has gone to plan your system will have upgraded correctly.
To make sure it really has all gone to plan restart the computer and boot into the Windows partition.
Again hopefully everything works as before.
Fixing Grub
If you are like me then you probably don't want Ubuntu to appear multiple times on the boot list and you may want the Windows option to come first especially if other members of the family use the computer and are used to using Windows.
Open a terminal window by opening the Dash and typing "Term". Click on the terminal icon.
Type sudo gedit /etc/default/grub
# If you change this file, run 'update-grub' afterwards to update
# /boot/grub/grub.cfg.
# For full documentation of the options in this file, see:
# info -f grub -n 'Simple configuration'
GRUB_DEFAULT="2"
#GRUB_HIDDEN_TIMEOUT="0"
GRUB_HIDDEN_TIMEOUT_QUIET="true"
GRUB_TIMEOUT="10"
GRUB_DISTRIBUTOR="`lsb_release -i -s 2> /dev/null || echo Debian`"
GRUB_CMDLINE_LINUX_DEFAULT="quiet splash"
GRUB_CMDLINE_LINUX=""
If you want Windows to be the default option then you can either edit the grub.cfg file (which explicitly says not to edit it) or you can change the default to point to the Windows option first.
Whilst editing the /etc/default/grub file won't put Windows top of the list it will make it the highlighted option when you start the computer.
To do this change GRUB-DEFAULT to be the position in the list that Windows is when you start the computer.
On my computer Ubuntu is first, Ubuntu Advanced options is next and Windows is third.
Note that the numbering starts from position 0 to Ubuntu is position 0, Ubuntu Advanced is 1 and Windows is 2.
Save the file when you have changed the default and run sudo update-grub.
The Grub file will be updated and if you reboot Windows will be selected automatically.
With regards to the extra Ubuntu entries the reason there are likely multiple entries is that you will have more than one Linux kernel installed.
You can either edit the grub.cfg file directly to remove the extra entry (not recommended) or you can remove the additional kernels by running Synaptic and looking for older installed version numbers.
Personally I would leave the duplicate entries there and just not select them.
Thankyou for reading.
If you found this guide useful please consider sharing it using one or more of the sharing buttons below.
# If you change this file, run 'update-grub' afterwards to update
# /boot/grub/grub.cfg.
# For full documentation of the options in this file, see:
# info -f grub -n 'Simple configuration'
GRUB_DEFAULT="2"
#GRUB_HIDDEN_TIMEOUT="0"
GRUB_HIDDEN_TIMEOUT_QUIET="true"
GRUB_TIMEOUT="10"
GRUB_DISTRIBUTOR="`lsb_release -i -s 2> /dev/null || echo Debian`"
GRUB_CMDLINE_LINUX_DEFAULT="quiet splash"
GRUB_CMDLINE_LINUX=""
If you want Windows to be the default option then you can either edit the grub.cfg file (which explicitly says not to edit it) or you can change the default to point to the Windows option first.
Whilst editing the /etc/default/grub file won't put Windows top of the list it will make it the highlighted option when you start the computer.
To do this change GRUB-DEFAULT to be the position in the list that Windows is when you start the computer.
On my computer Ubuntu is first, Ubuntu Advanced options is next and Windows is third.
Note that the numbering starts from position 0 to Ubuntu is position 0, Ubuntu Advanced is 1 and Windows is 2.
Save the file when you have changed the default and run sudo update-grub.
The Grub file will be updated and if you reboot Windows will be selected automatically.
With regards to the extra Ubuntu entries the reason there are likely multiple entries is that you will have more than one Linux kernel installed.
You can either edit the grub.cfg file directly to remove the extra entry (not recommended) or you can remove the additional kernels by running Synaptic and looking for older installed version numbers.
Personally I would leave the duplicate entries there and just not select them.
Summary
I hope that those of you who installed Ubuntu 13.04 from my initial guide will find this a useful guide for now upgrading your system to Ubuntu 13.10.Thankyou for reading.
If you found this guide useful please consider sharing it using one or more of the sharing buttons below.
To make it easier for everyone who wants to read my Ubuntu based articles and tutorials I have formatted them, rewritten them and added extra content which has resulted in the eBook "From Windows To Ubuntu".
The book isn't massive like a SAMS guide so it isn't going to take you forever to read it but there is certainly a lot of content.


This comment has been removed by the author.
ReplyDeleteIf updating your ubuntu partition has any effect on your windows partition. You might be doing something wrong.... I've updated several dual booted systems dozens of times and not once has an ubuntu update caused problems with my windows system (Not because of luck; because it makes no sense for updates to one partition to affect another). Updating windows on the other hand, you may need to fix the boot, but that's about it.
ReplyDeleteNot to say that backups should not be done, you should always maintain regular backups of all of your important files, but backing up all of the OSs on your system for a single OS upgrade like this is completely unnecessary.
It is the DBA in me that likes to recommend backups prior to doing tasks.
DeleteClonezilla (open source) can do backup either entire disk or partition by partitions. It has a text based GUI which is easy to use. In the backup scenario you described above, Clonezilla will do better. Instead of using two different tools (Windows Recovery and Linux Deja Dup), Clonezilla can do both backups. In your case, that would be a disk backup. As you already know how to make backup with the two tools you mentioned, you almost already know how to use CloneZilla. Give it a try, I think you'll like it.
ReplyDeleteFunny you should mention that. I have been evaluating Clonezilla with a view to writing an article about it.
DeleteYes.... i was searching for this.I will definitely follow this.
ReplyDeleteWindows 8 Update
I am using a Windows 7 PC and older version of Ubuntu installed. I want to upgrade to latest version of Ubuntu. How do I do that? Can I uninstall Ubuntu entirely and install latest one, without losing any data? or do I have to upgrade it in a step wise version manner? any help would be appreciated.
ReplyDelete